
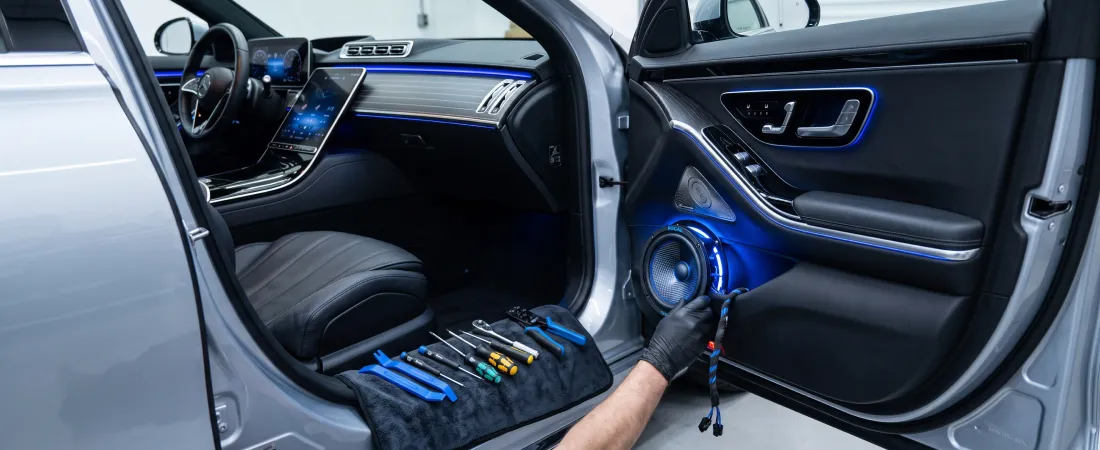
Upgrading factory door speakers is one of the most effective ways to improve overall sound clarity, vocal definition, and midbass punch in your vehicle. Factory door speakers are almost universally constructed from low-cost paper cones, narrow copper voice coils, and small ferrite magnets engineered to meet minimal assembly budgets.
Replacing these stock drivers with quality aftermarket coaxial or component speakers expands dynamic range and restores high-frequency detail. However, achieving optimal acoustic performance requires more than just fastening screws; verifying mounting depth, testing electrical polarity, isolating vibrations, and sealing the acoustic baffle are essential to getting the sound you paid for.
Essential Tools and Preparation
Before disassembling vehicle doors, gathering the right tools prevents broken retention clips, torn vapor barriers, and scratched interior plastics:
- Non-Marring Trim Pry Tools: Plastic pry bars designed to pop door panel fasteners without marring door cards or paint.
- Screwdrivers & Torx Bits: Most modern vehicles conceal Phillips screws, 7 mm/8 mm hex bolts, or T20/T30 Torx fasteners behind latch covers and armrests.
- Drill & Metal Drill Bits: Required if your vehicle’s factory speakers are riveted to the door sheet metal rather than fastened with standard screws.
- Vehicle-Specific Harness Adapters: Plug-and-play wiring leads that mate your aftermarket speaker terminals directly to the OEM harness without cutting factory wiring.
- Aftermarket Speaker Adapter Brackets: Molded ABS or HDPE plastic rings that adapt standard 6.5-inch or 6×9-inch drivers to your vehicle’s proprietary factory cutout.
Safety First: Always disconnect the negative battery terminal before starting any automotive electrical work. Because vehicle doors remain open during the upgrade, disconnecting power protects against interior dome light battery drain and prevents accidental short circuits inside the door cavity.
Step-by-Step Installation Process
Upgrading aftermarket door speakers involves six methodical steps:
1. Door Card Disassembly
Begin by locating and removing all hidden screws securing the interior door card. Fasteners are commonly hidden inside the door pull cup, behind the plastic interior handle bezel, or along the lower map pocket perimeter. Insert a nylon trim pry tool between the door panel and the metal frame, applying gentle leverage until the plastic retaining clips release. Lift the panel straight upward to clear the window ledge, unplug the power window switches and courtesy lights, disconnect the latch cables, and set the door card safely aside.
2. Removing the Factory Speaker
Examine how the factory speaker is secured to the door structure. If the speaker is fastened with screws or bolts, loosen them and unseat the driver. If the factory speaker basket is secured with aluminum rivets, use a 1/8-inch or 9/64-inch high-speed drill bit to drill through the center of each rivet head. Unclip the OEM wiring harness connector and remove the factory speaker.
3. Mounting Depth and Window Clearance Verification
Before securing the new driver, verify physical clearance inside the door shell. Bolt the aftermarket adapter bracket firmly to the door metal. Temporarily position your new speaker into the bracket and roll the power window down completely. Confirm that the descending window glass and internal regulator mechanisms clear the speaker magnet and frame assembly. If contact occurs, install a thicker mounting spacer or opt for a shallow-mount speaker design.
4. Wiring and Electrical Polarity
Connect your speaker adapter harness to the driver’s positive and negative terminals. Ensuring correct electrical polarity across all channels is critical:
- The positive (+) terminal connects to the positive amplifier or source lead.
- The negative (-) terminal connects to the negative return lead.
If one door speaker is wired with reversed polarity, its cone pushes outward while the opposing speaker pulls inward (180° phase inversion). This acoustic error causes destructive phase cancellation, which wipes out midbass response and leaves vocals sounding hollow and distant. To understand how audio signals move through your setup, review signal flow explained.
5. Acoustic Coupling and Baffle Sealing
A speaker produces sound waves from both the front and rear of its cone. If the high-pressure front waves bleed around the speaker rim and collide with the out-of-phase rear waves inside the door, your midbass cancels out. Apply closed-cell foam weatherstripping tape between the adapter bracket and the steel door frame to form an airtight seal. Furthermore, install a front foam decoupling ring around the speaker flange so acoustic output is funneled directly through the door card grille into the cabin rather than dissipating behind the interior panel.
6. Functional Testing and Reassembly
Before snapping interior panels back into place, reconnect the vehicle battery and test the audio system. Play a music track with dynamic bass, pan the balance left and right to verify proper phase response, and operate the power window to verify zero interference. Once verified, reattach the release cables, reconnect electrical harness plugs, and press the perimeter panel clips firmly back into the door frame.
Recommended Video Resources
How to Install Car Speakers
This video demonstrates step-by-step door panel disassembly, factory speaker removal, wire harness adapter connections, and mounting bracket installation.
How To Install Better Door Speakers
An in-depth tutorial demonstrating cost-effective installation techniques, how to mount aftermarket adapter rings properly, and how to create airtight seals for punchy midbass.
Common Mistakes
- Failing to Verify Window Track Clearance: Neglecting to roll the window down during test fitting can cause the moving glass to shatter against the speaker magnet.
- Reversing Electrical Polarity: Inverting positive and negative leads on one speaker introduces severe acoustic phase cancellation, stripping the cabin of midbass punch.
- Mounting Directly to Uneven Sheet Metal Without Gaskets: Screwing an adapter ring onto uneven door metal leaves air gaps that degrade low-frequency response and introduce buzzing.
- Reassembling the Door Panel Before Testing: Snapping all retention clips back in place before testing speaker output and window movement leads to unnecessary teardowns if a wire comes loose.
- Twisting and Taping Wires: Wrapping stripped speaker wires with standard electrical tape invites oxidation and loosening under heat; use soldered heat-shrink connections, crimp caps, or plug-and-play adapter harnesses.
References
- Crutchfield Learning Center – How to Install Car Speakers
- Sonic Electronix Learning Center – Car Audio Installation & Component Matching
- JL Audio School of Sound – Understanding Audio Fundamentals and Phase Coherence